Nx Platform Overview
Data Source Integrations
User Management
User Management
Dashboards Overview
Classification Structure
Data Risks
Dashboard Filters, Queries and Customization
Workflow Overview
Dark Data Classification
Contextual Classification
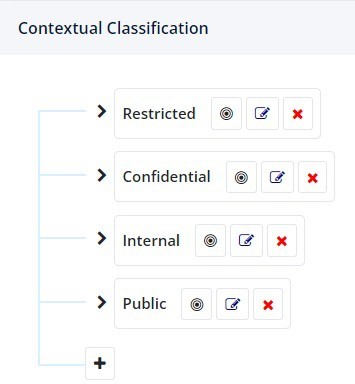
Nx provides out-of-the-box data classifications of Restricted, Confidential, Internal and Public . To align with your specific classification policy and naming standards, Nx provides the ability to easily customize classification labels to your own corporate standards, including the capability to add or remove the number of classification levels. As an Administrator, you can control the implementation of your corporate data classification levels (Level 1), the initial business record type (Level 2) and other sub- classification (Level 3 and 4) to ensure adherence to your corporate policies and data management standards.
Please Note: Data Guardians can create and manage sub-classifications to each of these labels (Levels 3 and 4) so they can be as customized as needed to meet the dynamic needs of each department or division.
Perform the following steps to view/edit classification levels:
1. In the admin console, go to Classification > Contextual Classification

2. The screen will show the classification tree as well as the associated record types for each classification level. The following related actions can be executed from this view for any classification level:
 |
To edit an existing classification label, click on the Edit icon |
 |
To add a new classification label, click on the Plus (+) icon |
 |
To delete an existing classification label, click on the red X icon |
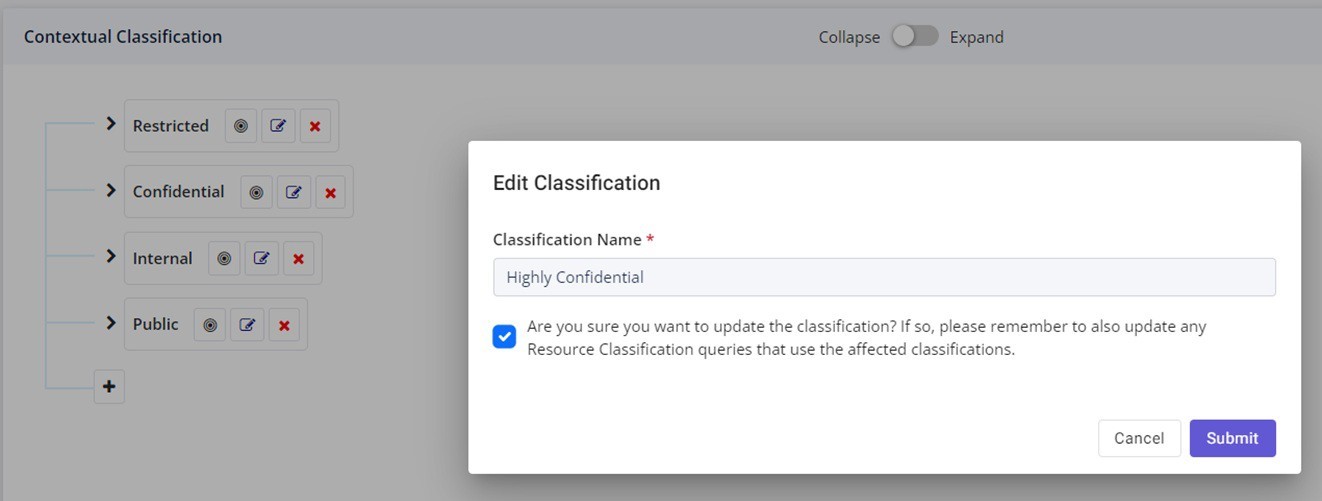
3. To edit the classification label, click on the Edit button, enter the new classification name , check the box to update the classification and hit Submit. For example, the following will replace Restricted label with Highly Confidential.
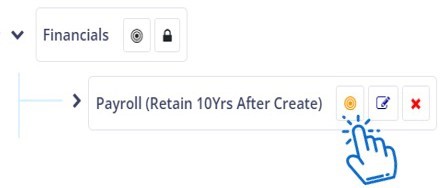
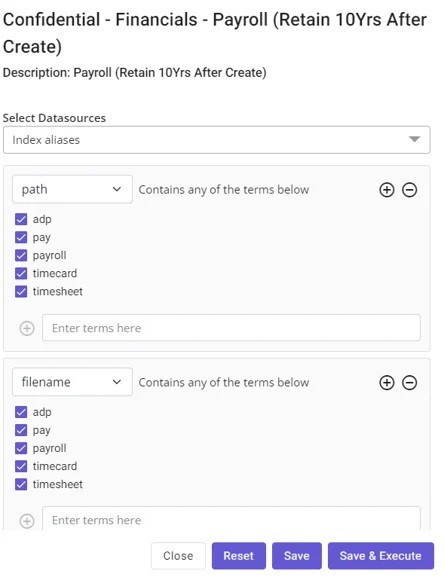
4. By clicking on any of the “target” circle icons, you can view, edit or create new metadata keywords and file attributes to assist in the preliminary classification of typically up to about of 75% of your data sets. Nx has a broad number of pre-defined records types using metadata only and prior to conducting content scans. In the example below, simply type in the keywords or modify the existing data library and hit Enter from the keyboard in which it will automatically be listed alphabetically. These metadata attributes are supported for Path, Filename, and File Extensions. It also supports content keywords, but these can only be applied after the content scans have already been completed.
5. The associated Contextual Classifier can be applied for 1 to multiple data sources with the available list from the Select Datasources drop-down menu
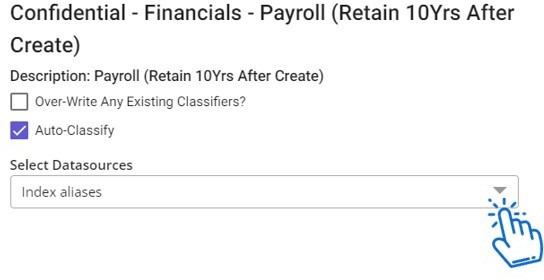
6. After you completed your entries, you can Save and execute at a later time or Save & Execute to apply the classification right away. If you prefer to wipe all of the logic, simply select Reset
Please refer to Simple Classifiers section for details on configuring classification rules.