Nx Platform Overview
User Management
Dashboards Overview
Data Risks
Dashboard Filters, Queries and Customization
Dark Data Classification
Workflow Customization
Perform the following to customize workflow steps and approvers for your department and division.
1. Login to the Nx platform and go to Workflow and Customization

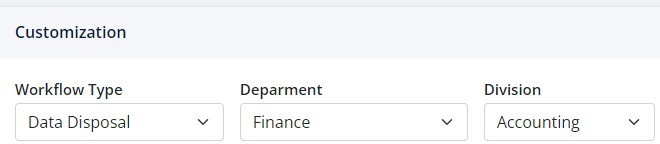
2. On the below screen, select your Department and Division to configure/review your workflow steps
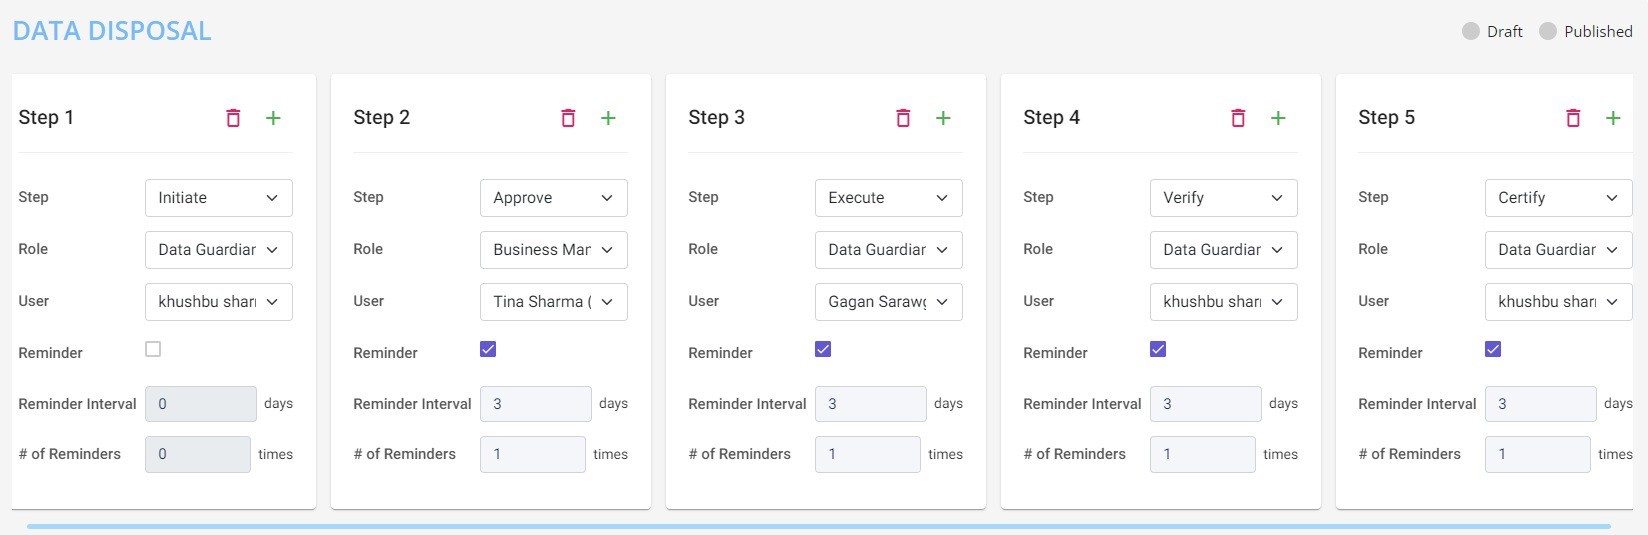
3. Under Data Disposal section, you will get the flexibility to choose the number of steps you need and who will be performing each of those steps. By default, 8 steps are configured. You can click on the red Trash Can icon to delete existing steps or green Plus icon to add more. In the below example, 5 steps are configured –
Step 1 Initiate – assign a person under your Department and Division who can initiate a Data Disposal workflow
Step 2 Approve – select a person who can approve the Data Disposal workflow. This person could be from any department and division (e.g., Privacy, Legal, etc.). Also, you can have multiple approvers depending on your use case
Step 3 Execute – assign a person to execute the workflow
Step 4 Verify – select a person who can verify that data is successfully disposed from the repository
Step 5 Certify – assign a person who can certify that data in scope for Data Disposal is successfully deleted and the Data Disposal certificate can now be generate
Once any step is complete, an automated email will be sent to the next person in the workflow step to let them know that an action is pending for them. You also get the flexibility to configure Reminders. By default, it is 3 days.
Note: Reach out to your Nx Administrator if you are unsure if emails are configured or emails are not working as expected
4. Once you have configured the workflow, click on Publish to start using it for your selected Department and Division or Save as a Draft if you would like to publish it later

5. Once the workflow steps are successfully published, you will see the Green dot next to Published
Note: You are now ready to generate Data Disposition plan for your department and division to follow the steps listed above.