Nx Platform Overview
Data Source Integrations
User Management
Classification Structure
Repository Integration
Nx can be integrated with over 400 different structured and unstructured data repositories/applications, both on-premise and in the cloud. Based on your scope, you can integrate the repository/application with Nx using the following steps:
1. Login to Nx using administrative credentials
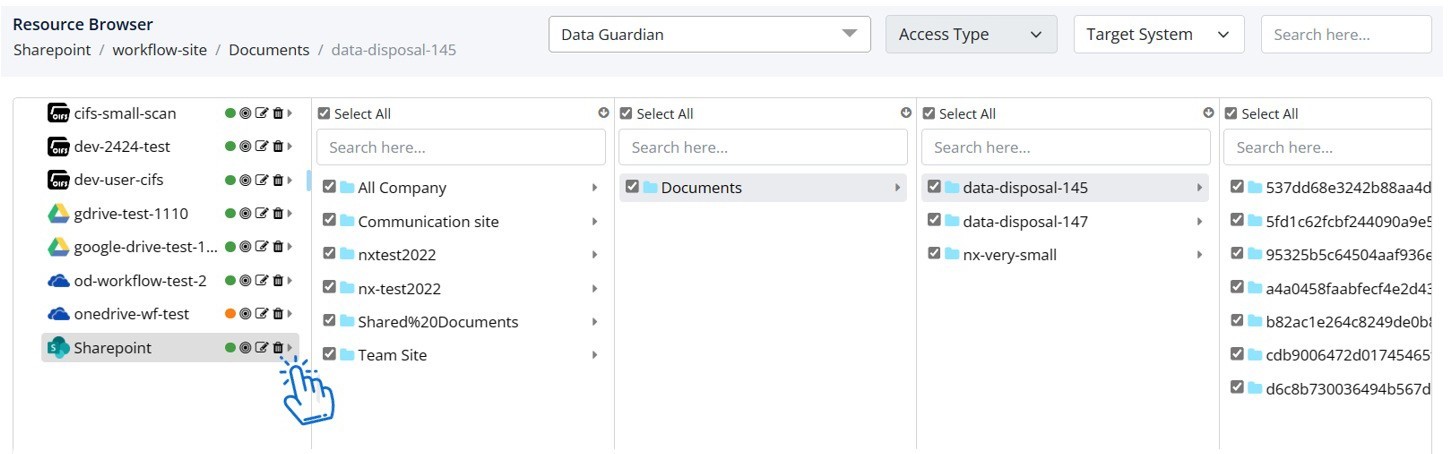
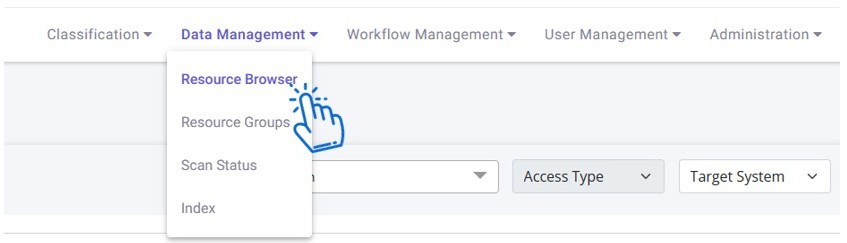
2. Go to Data Management > Resource Browser
3. On this Resource Browser screen, you can view all existing data sources that are integrated with Nx
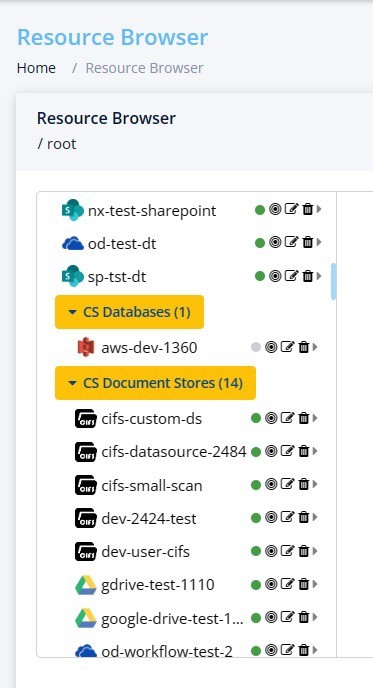
4. To integrate a new source, click on Add Source on the top of the screen

5. Based on your source type, update the following fields
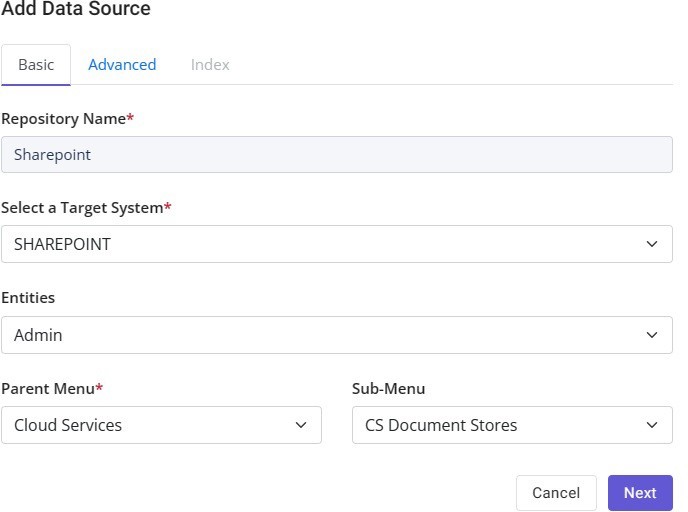
Please note: These fields will vary depending on your target system. Please reach out to your Nx Solution's Engineer if you havc any questions.
6. Provide the access information for Nx to connect to your selected target source and then click Test Connection.
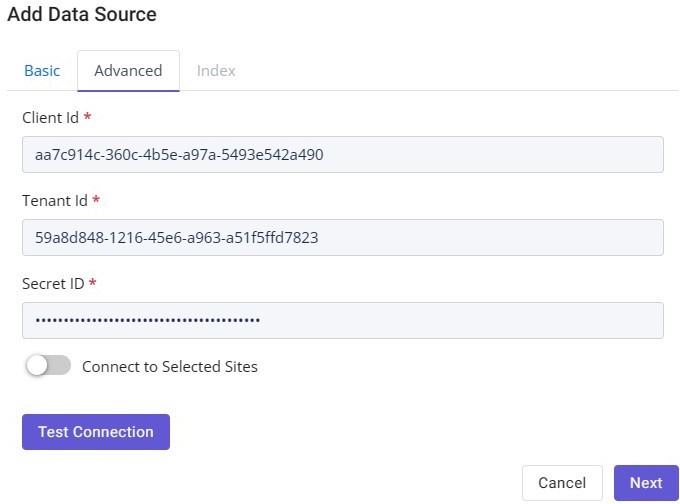
Please note: Nx does not install any agents or software on any repositories. It just requires a "Read Only" account to access the data on the targeted data source.
7. A green check next to Test Connection confirms that the connection was successful and then click Next
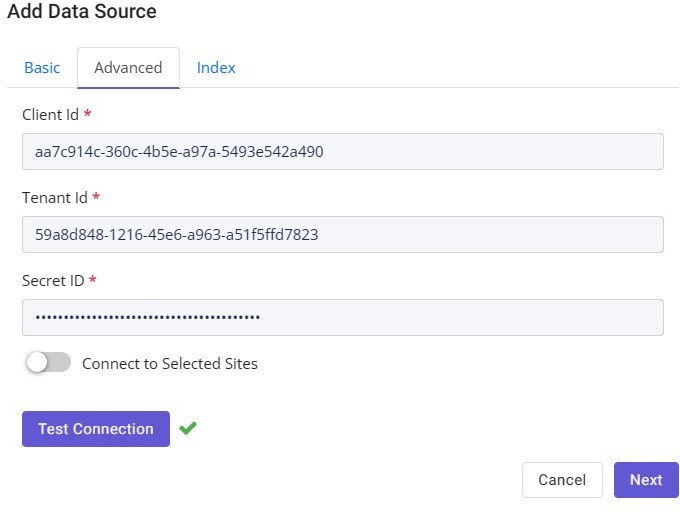
Please note: Nx provides you the flexibility to only connected to certain sites within your SharePoint farm. If you would like to scan only a few sites, then enable Connect to Selected Sites option and provide the list of sites.
8. On the following screen, select the Index (directory depth of the search) and click Submit
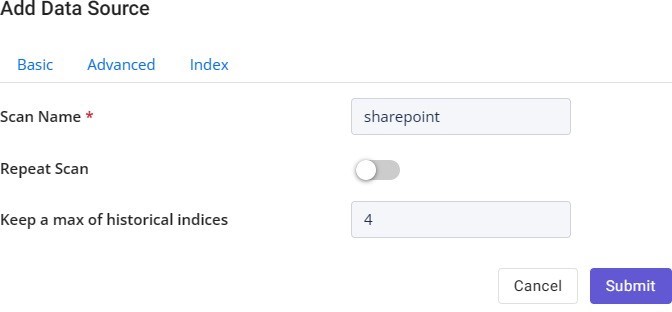
Please note: You can configure Nx to Repeat this scan on a periodic basis by enabling Repeat Scan option.
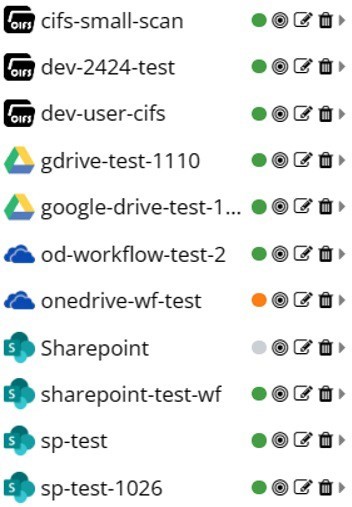
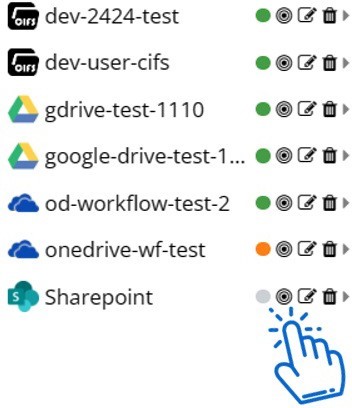
9. Upon successful submission, you will be able to view this data source under the Resource Browser
|
Shows the status of Data Source Scan. Grey means that the scan has not yet started, Green means the scan has successfully complete, Yellow means that the scan is in progress and Red means that the scan was paused/terminated |
|
Shows the information about the scan and allows you to initiate, pause or stop data source scan from here |
 |
For editing a data source attribute |
 |
To delete a data source |
 |
To view the index of the data source. This will be available once the data source scan is complete. |


10. Once the data source is successfully integrated, click below to start the Data Source Scan (Index Scan)
11. On the following screen, click on the Green Play button to start the scan
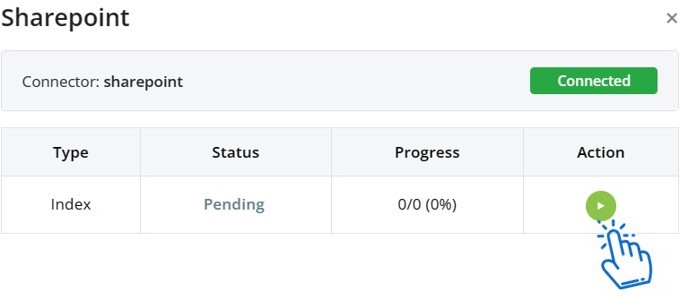
Please note: It may take few seconds for the scan to start depending on your network connectivity. Also, it may take some time to finish the index scan depending on the number of indexes you have selected to scan and the overall size of your data source.
Following screen shows that the scan is running
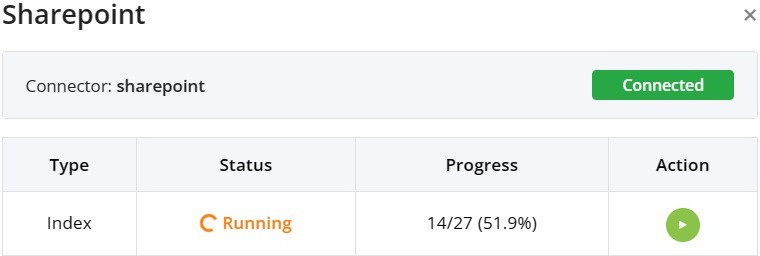
And following shows the scan is successfully completed

12. Once the scan is completed, you can view the indexes by clicking on the play button next to the data source