Nx Platform Overview
User Management
Dashboards Overview
Data Risks
Dashboard Filters, Queries and Customization
Dark Data Classification
Data Source Scans
One of the first and essential tasks as a Data Guardian will be to connect and extract data from the various data sources you need to obtain visibility and gain insights. Nx supports a robust collection of data scan types (e.g., metadata, content, OCR text extraction, etc.) to meet your diverse data management requirements.
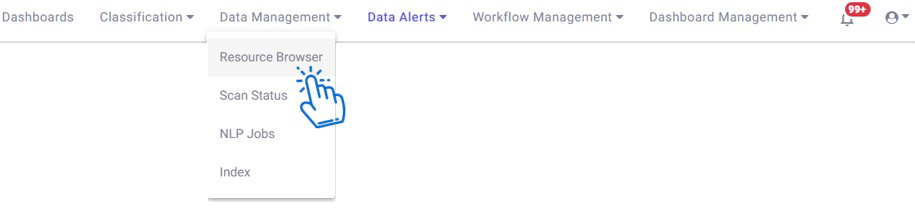
1. To conduct an initial scan or to setup recurring scheduled scans, navigate to the upper right section and select Data Management > Resource Browser from the menu
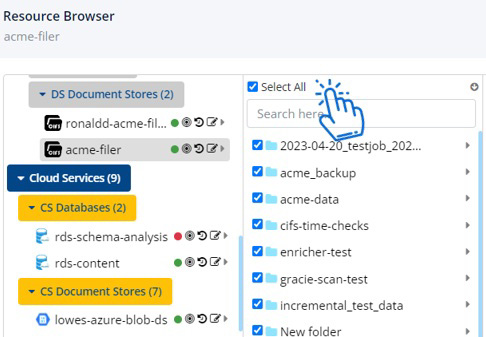
2. Nx’s Resource Browser provides both complete as well as very discrete data ingestion to meet your data management goals. By selecting the data source, it will then provide its directory structure in the right panel. By following the paths and then Select All or only discrete paths determine the scan scope for that resource.
3. Select the data source that you would like to scan and click on Edit Source icon. The pop-up box below then appears. By default, Nx is configured to run Metadata Scan to provide a rapid inventory of all
files stored in whatever data store you select. It also supports preliminary auto-classifications of the scanned data. If you prefer to run content or privacy analysis or OCR scans, then select the options.
You can also further target the scan types with Include or Exclude specific files extensions. Once done, click Next.
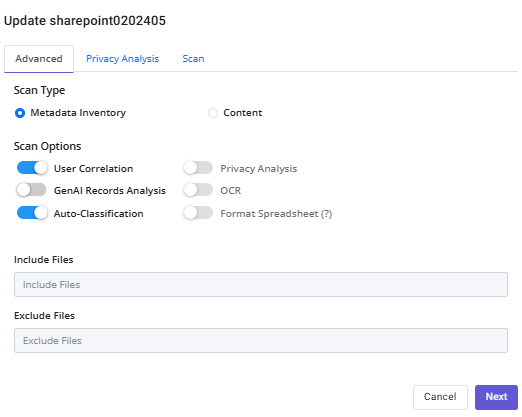
Please Note: Conducting content scans as the initial scan type may result in excessive data processing times. You may find it more productive to run targeted content scans using the Smart Scan features from the Data Catalog Dashboard.
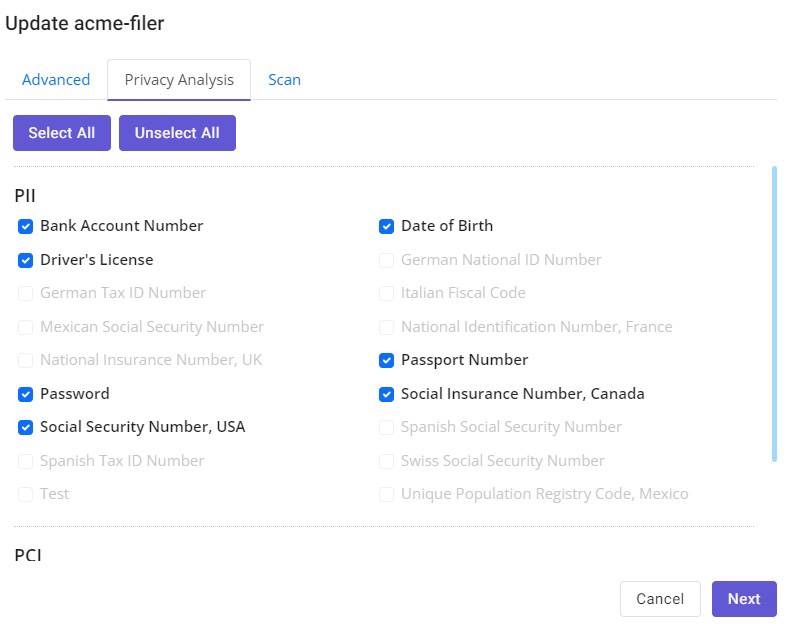
4. Here you can either select all the privacy attributes enabled in your environment by the administrator or just choose the one's applicable to this data source. Once done, click Next .
5. Here you can name the scan job and control the frequency for recurring scan.
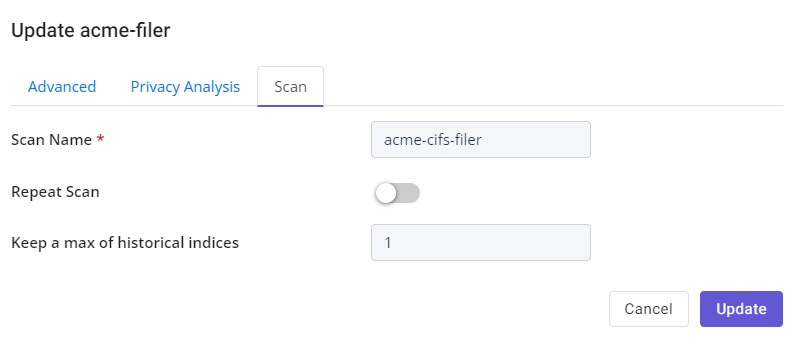
6. If you would like to run the scan on a periodic basis, enable Repeat Scan and select the preferred frequency for recurring scans. Once complete, click on Update .
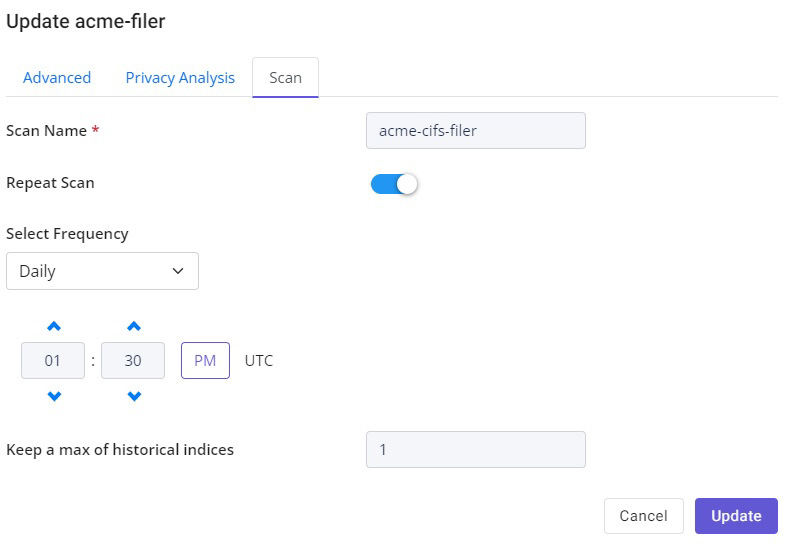
Please Note: It is not recommended to enable recurring scan until after you have successfully reviewed the initial scan results.
7. To run the scan based on the setting you have configured, click on Show Jobs Information next to the target data source.
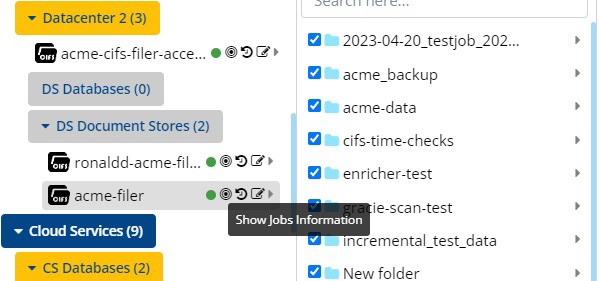
8. Under Action, click on Play icon to initiate the scan. You can track progress of the scan and Pause or Stop the scan from this screen.

Please Note: Pause will suspend the associated scans in progress, but can be resumed by clicking on the Play button. If you Stop the scan, it will terminate at that point and cannot be resumed unless you re-run a new scan.